引言
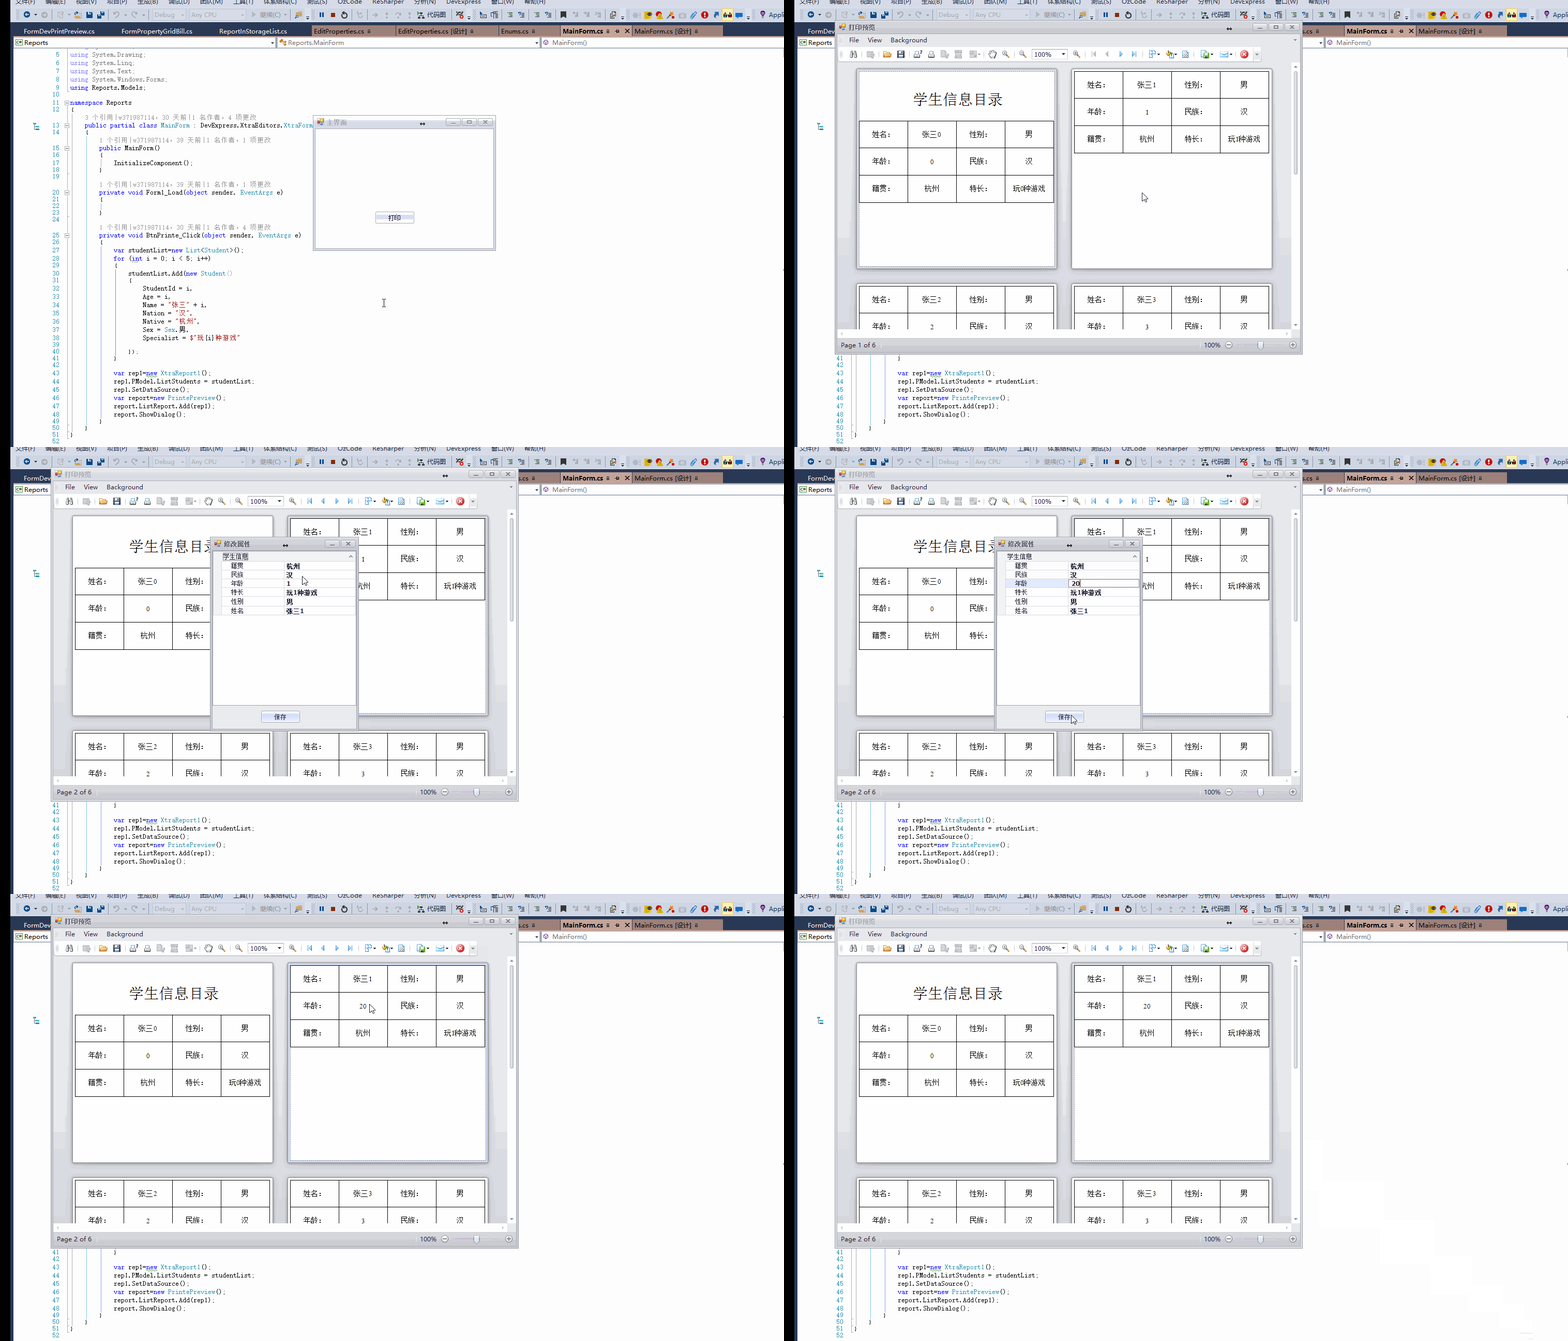
打印功能对于一个系统来说通常是强需求,每个系统都会根据自己所提供的服务生成不同的打印模板,但光有模板往往不够用,因为有时会需要在打印预览(PrintPreview)时根据打印内容临时修改打印的数据,而且这种修改并不需要应用于打印数据源的修改,只需要打印出变更后的内容就行了;所以我们只需修改内存中的数据,然后重新打印就可以了。
在最新的Devexpress 17.1中XRLable,XRTableCell和Character Comb有EditOptions属性,可以实现直接在打印预览界面(PrintPreview)上修改打印的数据,具体请参考官方示例;但很可惜我相信大部分的系统都还和我用的一样,没有使用17.1,所以只能乖乖修改数据然后重新打印。
效果图
步骤
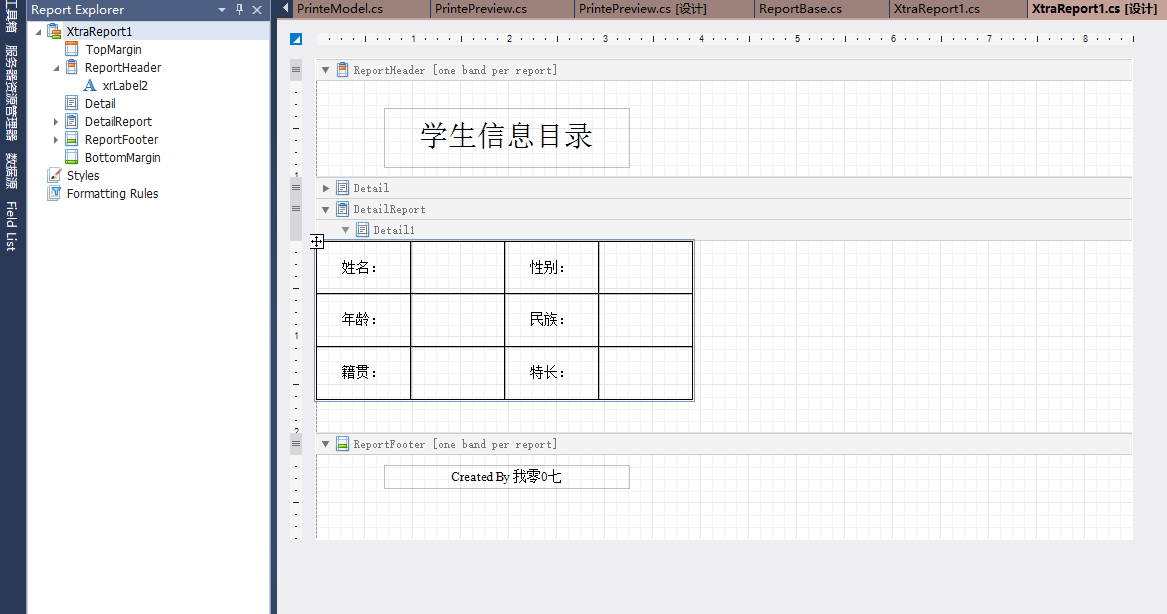
打印内容模板:
打印预览效果图:
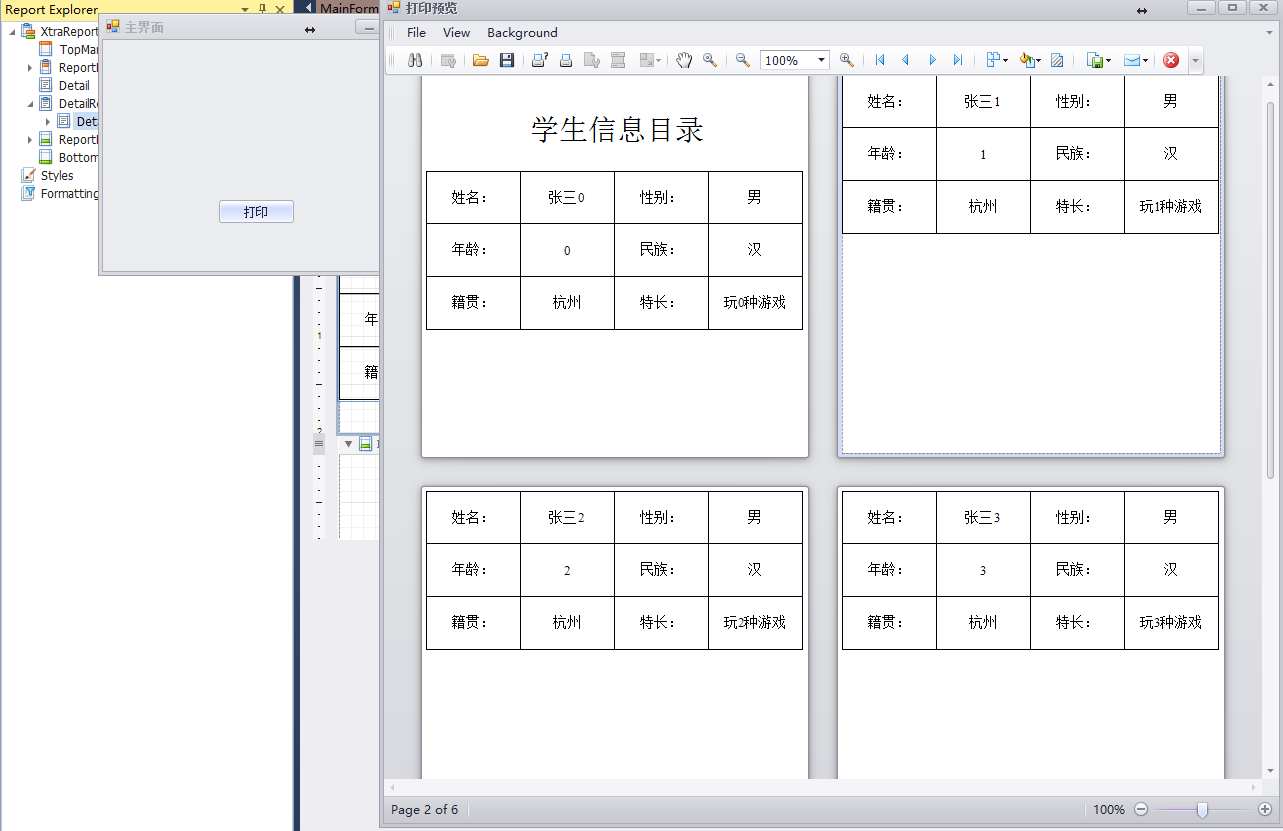
打印预览(PrintPreview)中的每一个Page表示一个model,我们需要一种方式来修改对应model的数据;通过查看官方示例我们知道,打印预览界面(PrintPreview)的元素实际上都是Brick类型的子类,你点击每一个Page都触发的是BrickClick事件:
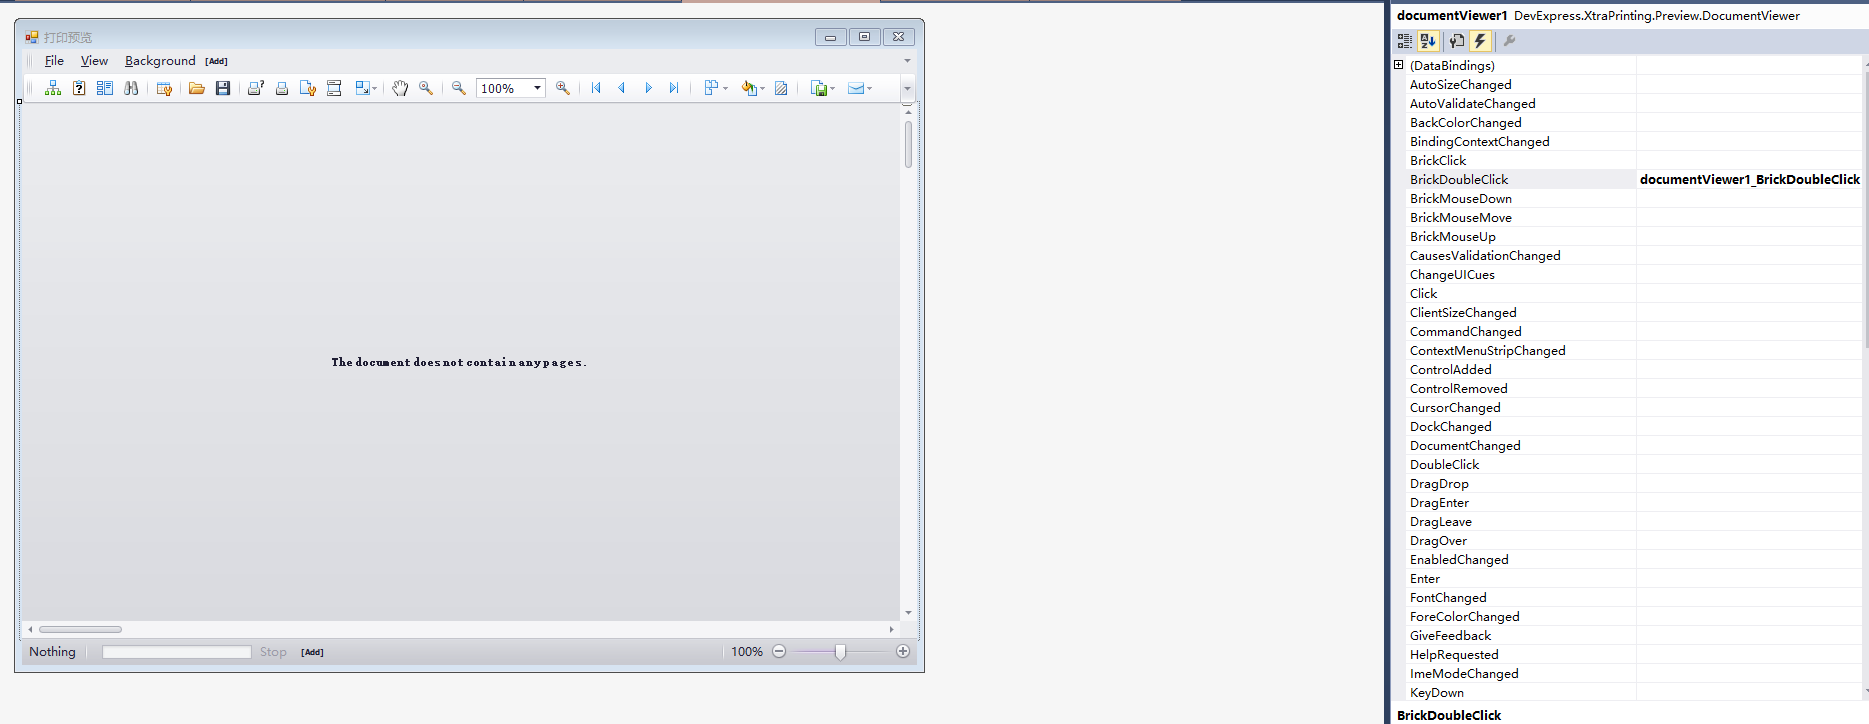
通过调试可以发现打印预览界面(PrintPreview)元素构成的层级关系:
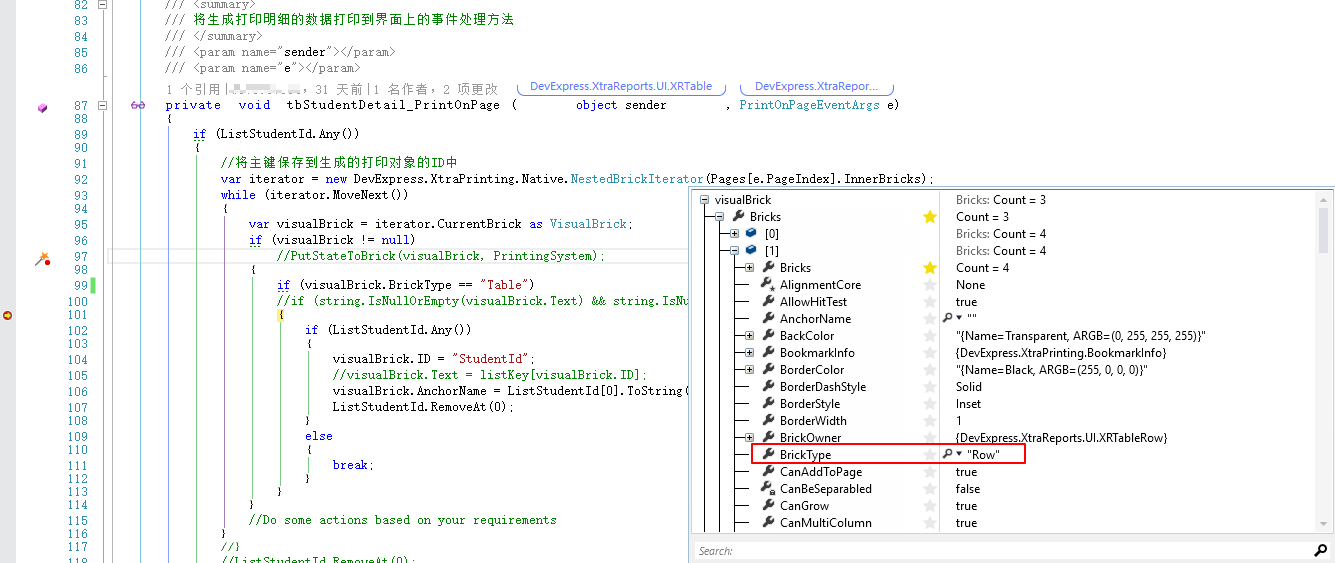
所以我们可以把每一个model的主键保存在每一个Page中,我选用了BrickTable(你也可以选择其它元素,只是在我的例子中刚好每一个Page对应于一个Table)
- 所以第二步是保存model的主键到BrickTable的AnchorName中(如果你在打印预览界面(PrintPreview)使用了目录功能,可能就需要用其它方式保存数据了)
1
2
3
4
5
6
7
8
9
10
11
12
13
14
15
16
17
18
19
|
private List<int> ListStudentId { get;set; }
private void Detail1_AfterPrint(object sender, EventArgs e)
{
var dtRowView = DetailReport.GetCurrentRow() as DataRowView;
if (dtRowView != null)
{
var studentId =Convert.ToInt32(dtRowView["StudentId"]);
ListStudentId.Add(studentId);
}
}
|
- 第三步,在生成打印明细数据时将主键赋值到BrickTable的AnchorName上
1
2
3
4
5
6
7
8
9
10
11
12
13
14
15
16
17
18
19
20
21
22
23
24
25
26
27
28
29
30
31
32
33
34
35
36
37
38
39
|
private void tbStudentDetail_PrintOnPage(object sender, PrintOnPageEventArgs e)
{
if (ListStudentId.Any())
{
var iterator = new DevExpress.XtraPrinting.Native.NestedBrickIterator(Pages[e.PageIndex].InnerBricks);
while (iterator.MoveNext())
{
var visualBrick = iterator.CurrentBrick as VisualBrick;
if (visualBrick != null)
{
if (visualBrick.BrickType == "Table")
{
if (ListStudentId.Any())
{
visualBrick.ID = "StudentId";
visualBrick.AnchorName = ListStudentId[0].ToString();
ListStudentId.RemoveAt(0);
}
else
{
break;
}
}
}
}
}
}
|
剩下的就是在打印预览界面(PrintPreview)双击Page弹出修改属性窗体后重新打印数据
1
2
3
4
5
6
7
8
9
10
11
12
13
14
15
16
17
18
19
20
21
22
23
24
25
26
27
28
29
30
31
32
33
34
35
36
37
38
39
40
41
42
43
44
45
46
47
48
49
50
|
private void documentViewer1_BrickDoubleClick(object sender, DevExpress.XtraPrinting.Control.BrickEventArgs e)
{
var studentId = string.Empty;
var iterator = new DevExpress.XtraPrinting.Native.NestedBrickIterator(e.Page.InnerBricks);
while (iterator.MoveNext())
{
VisualBrick visualBrick = null;
try
{
visualBrick = iterator.CurrentBrick as VisualBrick;
}
catch (ArgumentOutOfRangeException)
{
}
if (visualBrick != null)
{
if (visualBrick.ID == "StudentId")
{
studentId = visualBrick.AnchorName;
}
}
}
if(string.IsNullOrEmpty(studentId))return;
else
{
var newForm = new EditProperties(ListReport.First().PModel.ListStudents
.SingleOrDefault(c => c.StudentId == Convert.ToInt32(studentId)));
var dlg= newForm.ShowDialog();
if (dlg == DialogResult.OK)
{
var newReport=ListReport.First();
newReport.SetDataSource();
LoadData();
}
}
}
|
其中,修改属性的窗体使用了类似设计器属性修改界面的PropertyGridControl控件,当然你也可以自定义界面来实现类似功能,只要可以修改属性的值就行了
文章描述内容的示例项目已放在了Github上。


